In this latest tutorial, we will walk you through what is IPFS and Pinata Cloud. We will also help you understand the basic concepts of IPFS and its use cases in Web Development. We will also go over on what is Pinata Cloud and how it has successfully implemented the IPFS system.
What is IPFS?
IPFS is a Peer-to-Peer, Decentralized network for sharing and storing your files in a distributed manner. Unlike the regular internet data storage where you files and data are located and accessed using URL’s from a specific servers, IPFS retrieves your your data based on its Content rather than its location.
Key Features of IPFS:
Some of the Major features of a IPFS file system is given below:
- Content-Addressed: Instead of using a fixed location-based address like www.foobar.com, IPFS addresses contents using content-based addressing. Each file or a piece of content you upload to IPFS gets a unique cryptographic hash, which then serves as its identifier. So when you request for your content back, You are asking for it by its hash, ensuring you get exactly what you want, no matter where its stored.
- Decentralized: Your Files and Folders and other data are generally distributed across multiple servers or nodes in the IPFS network. There is no need for a centralized servers, and all the files can be retrieved from anyone who has them, improving redundancy, availability and performance
- Permanent and Versioned: When you upload any content to IPFS, You will receive a Permanent address. This makes it immutable and if you want to update the file, a new version with a different hash is created but the original files remains unchanged.
- Efficient: Think of IPFS like a Bittorrent kind of protocol, meaning that when you get your file, you are pulling pieces of it from multiple nodes across different network hat have the content, not just one source. This can speed up downloads, especially for large files or very popular content.
How IPFS Works?
we have seen the features of a IPFS protocol, Let us see how IPFS works
- Pinning: One of the major concepts in IPFS is pinning, To make sure that your files remain available over time, users or services needs to “pin” files to their Own IPFS nodes, make sure they are permanently hosted.
- Distributed Hash Table (DHT): IPFS uses a DHT to find nodes that store a particular piece of content, this help users and services to located their files across the IPFS network.
- Peer-to-Peer (P2P): IPFS relies on P2P communication between the network nodes. when you upload a file, it can be shared and accessed by any node in the network.
Use Cases
Some of the major use cases of IPFS network are listed below.
- Decentralized Websites: Unlike the traditional hosting, In Future, People may host websites on decentralized IPFS based networks and make them accessible through IPFS gateways. This achieves 100% redundant files and ensures zero downtimes and faster content retrieval
- NFTs and Digital Assets: Many NFT platforms use IPFS to store the digital files linked to NFTS, this ensures that they are decentralized and always accessible across different networks.
- Backup and Redundancy: Decentralized storage reduces reliance on a particular server and improves data redundancy for all the files and folders in the storage.
IPFS based content delivery creates a more robust and resilient web by distributing your content across the network rather than relying on specific servers. It’s part of a larger movement towards web3 and decentralization in centralized web technologies.
What is Pinata Cloud ?
Pinata Cloud is a SaaS platform that provides infrastructure to manage your files and other data using the IPFS network. These Services aims to provide IPFS services for more Users by offering their tools to:
- Pin files: to IPFS, ensuring that they remain accessible and stored across the IPFS network.
- File Storage: A File API which is very easier than S3, Lightning fast and durable
- Serve IPFS content over the web, with reliable gateways that make decentralized content accessible through traditional web browsers.
- Automate workflows related to content distribution, making it popular for NFT (Non-Fungible Token) projects, where digital assets need decentralized and permanent hosting.
Pinata offers both free and paid tiers, with the paid version providing more storage, faster pinning, and enhanced performance options. It’s used widely in decentralized applications (dApps), NFTs, and by anyone looking to leverage the distributed nature of IPFS for content storage and delivery.
How I created a Pinata CLI using its API ?
One of the latest features of Pinata is its File Storage API. You can read more about the Features here
Based on the Pinata Rest API’s for File Storage, I have created a Simple and Fast CLI application that helps any users and system admins to store and manage their Files to and from Pinata Cloud. Here is a detailed Step by Step Guide on how to run your Pinata CLI in your own Operating Systems.
Pre-Requisite
- A Machine with Python Installed (Preferably Python >= 3.9)
We have tested Pinata-CLI with majority of the Operating system like Ubuntu / Debian / Oracle Linux / Centos and in Windows 10 Operating system as well and we think as long as you have a Stable Python 3 Preferably greater than or equal to 3.9 installed. Our Pinata-CLI Setup would be a cake walk.
For this tutorial, we have taken a fresh Ubuntu 24.04 Operating system. (You can also Skip from Source Compilation and go-to Precompiled Steps Here..)
Video Tutorial: Setup and Run Pinata CLI from GitHub(Source Code) on Ubuntu 24.04
Installation and Setup on Ubuntu and Windows using Pre-Compiled Binaries Here.
Step 1: Check OS Version
Login to our Ubuntu Server with any SSH Compatible Client like Putty / mRemoteNG / Xshell
To Check the Operating System version. Issue the below command
cat /etc/*release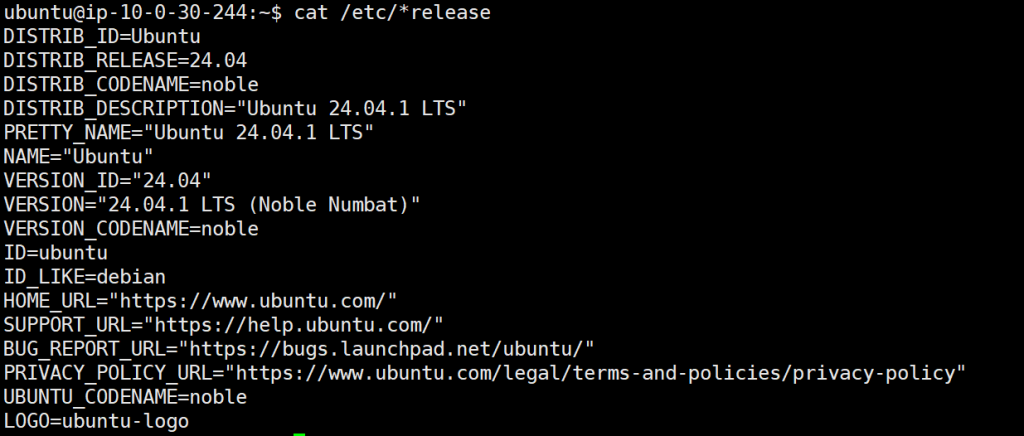
Step 2: Check Python Version
For Checking the Python Version installed, Lets issue the below command
python3 --version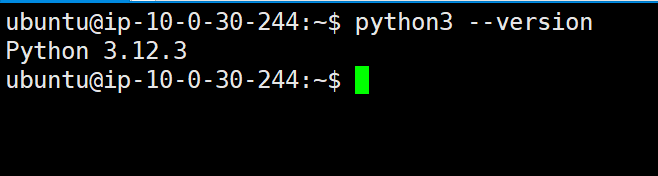
Step 3: Install Git Command
we need git command to clone the repo, Most of the time, the command is already available in the system, if not you can install using the below command
sudo apt-get install -y git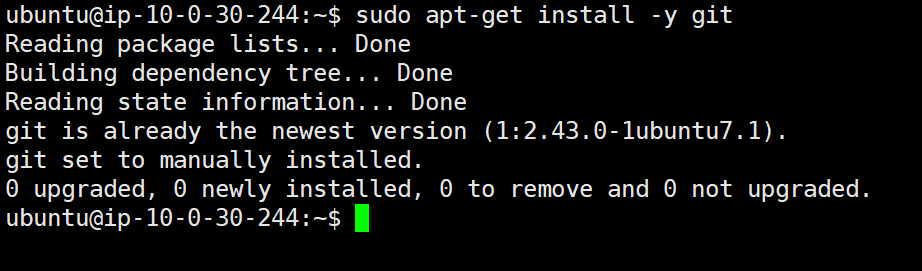
Step 4: Clone Pinata-Cli Repository
git clone https://github.com/oliverbennet/pinata-cli.git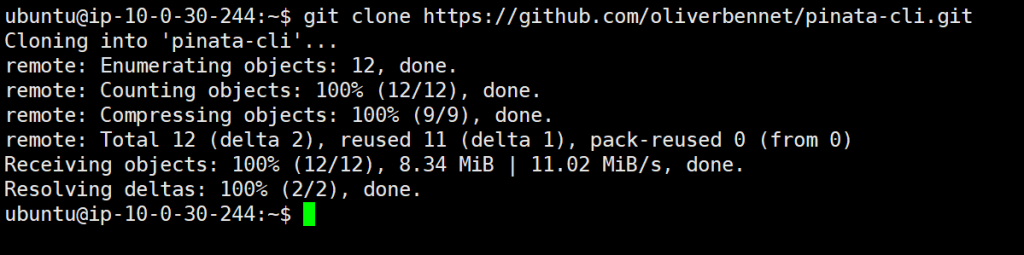
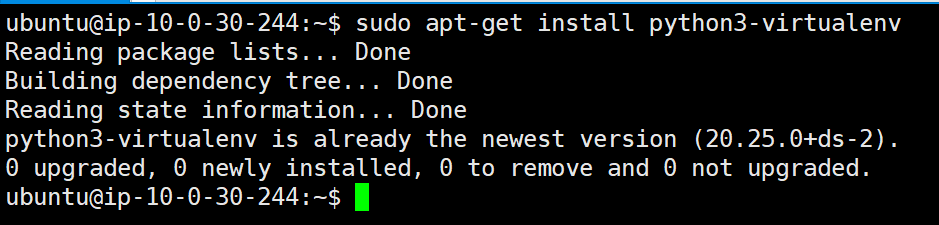
Step 5: Install and activate Python Virtualenv
sudo apt-get install python3-virtualenv
virtualenv pinata
source pinata/bin/activateNote: You can also use pip3 install virtualenv

Step 6: Install Python Modules
we have created a list of python dependencies through a requirements.txt which needs to downloaded and installed. For that, Issue the below command
cd pinata-cli
pip install -r requirements.txt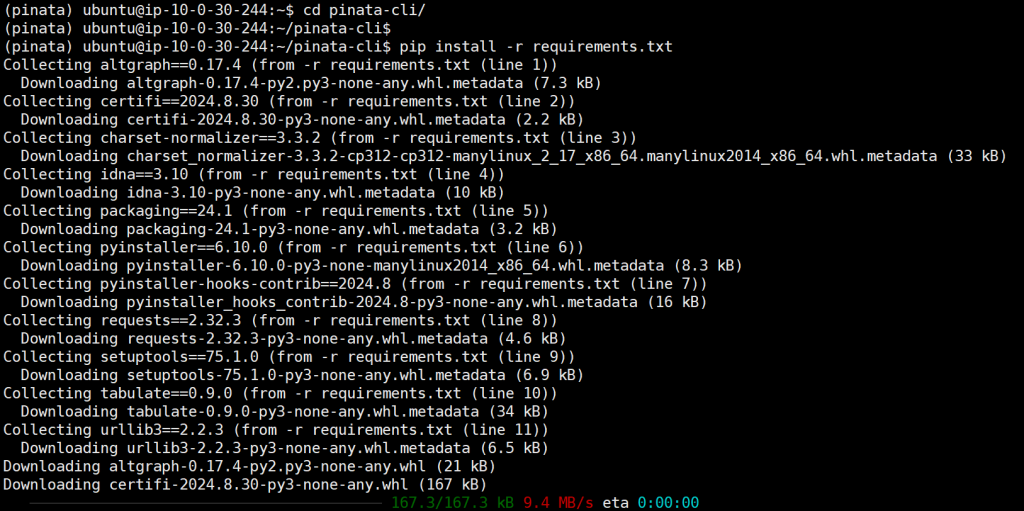
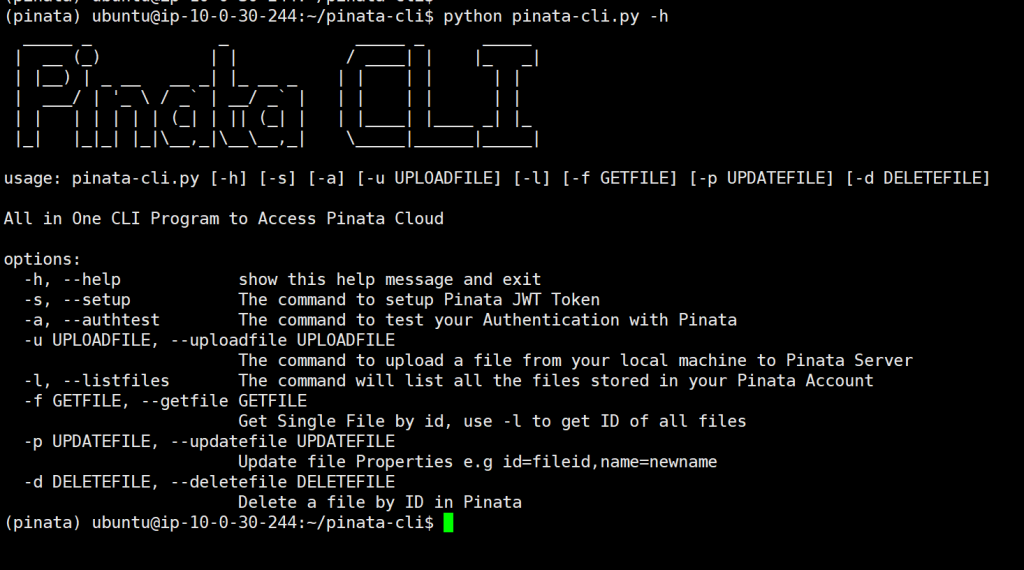
Step 7: Run pinata-cli.py and confirm
Now, Let us confirm whether our pinata-cli.py is working as expected. we can confirm it from the below command.
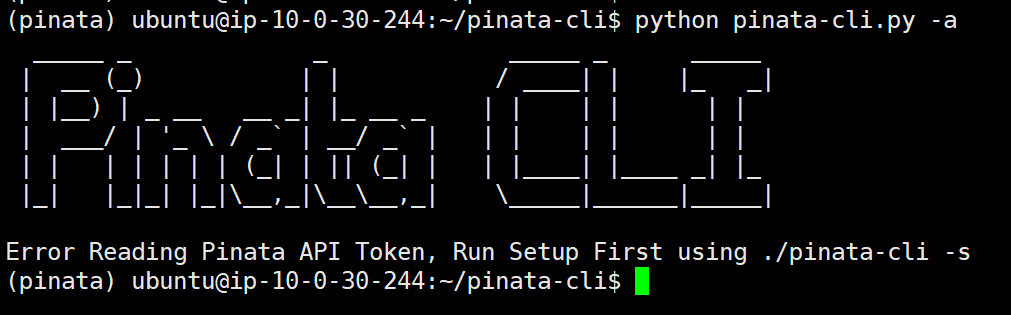
Step 8: Setup Pinata API Token (One time setup)
When we try to authenticate our CLI to Pinata Cloud, It will first ask us to setup Pinata JWT Token.
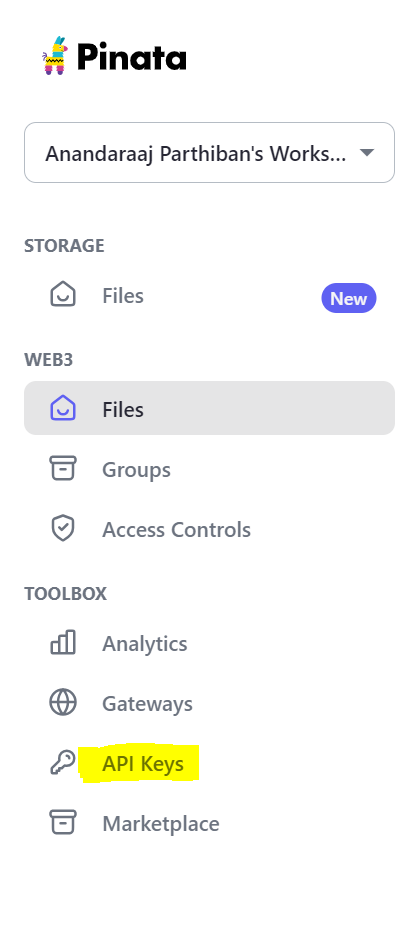
To setup Pinata JWT Token we need to login to our Pinata Account and create a New API Keys. Follow the instruction below.

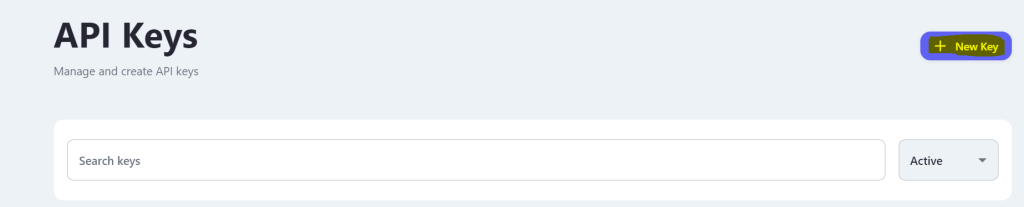
Click API Keys and Click New Keys
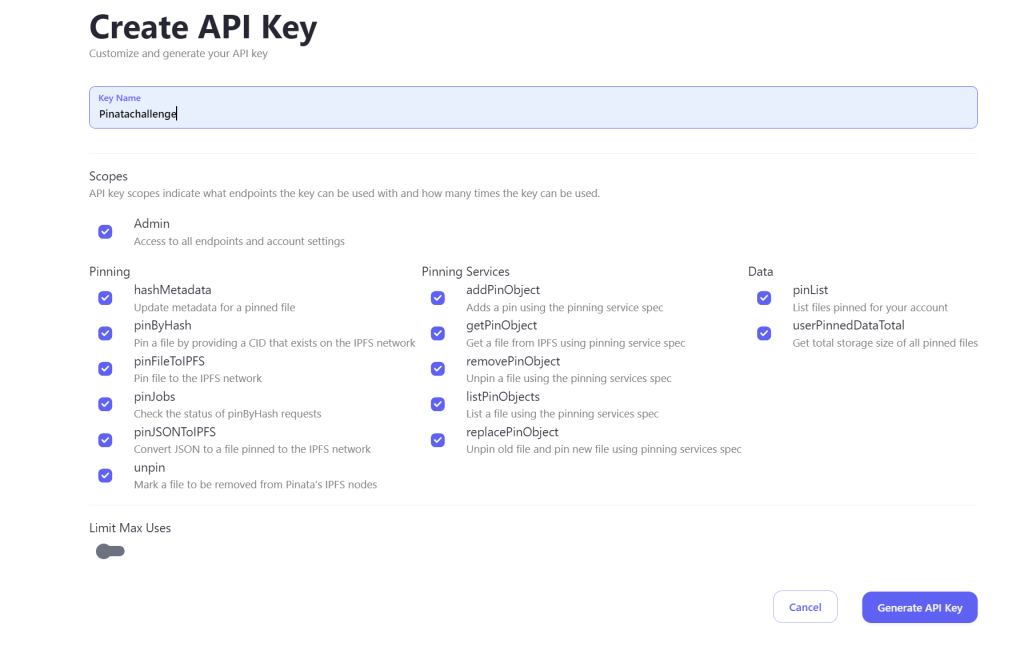
For this tutorial, we are selecting admin and naming it as “pinatachallenge”
This will Generate a JWT Token like below
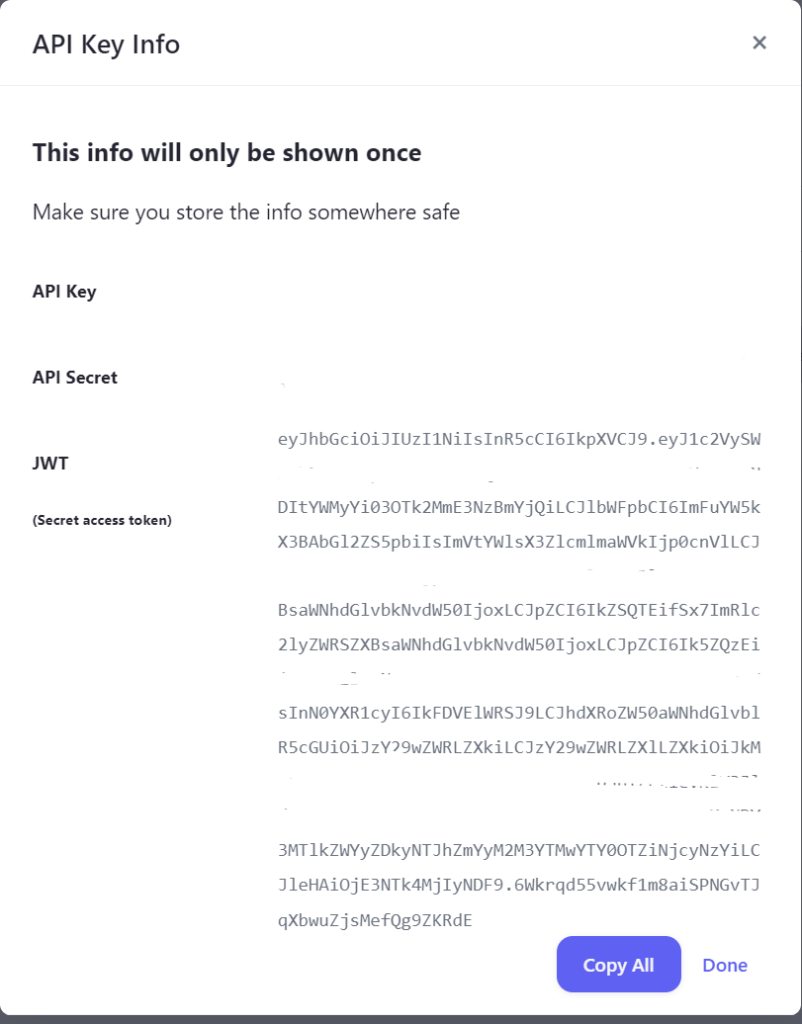
Click Copy All and save it somewhere securely.
Note: This is a one time viewable key’s so make sure you store it in a Persistent Storage
Now Come back to our terminal and setup the token with the following command
python pinata-cli.py -s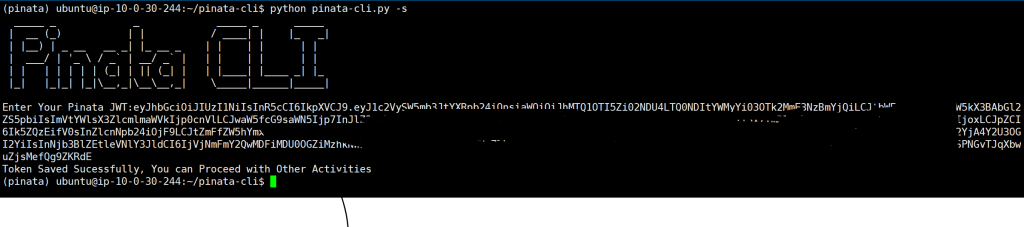
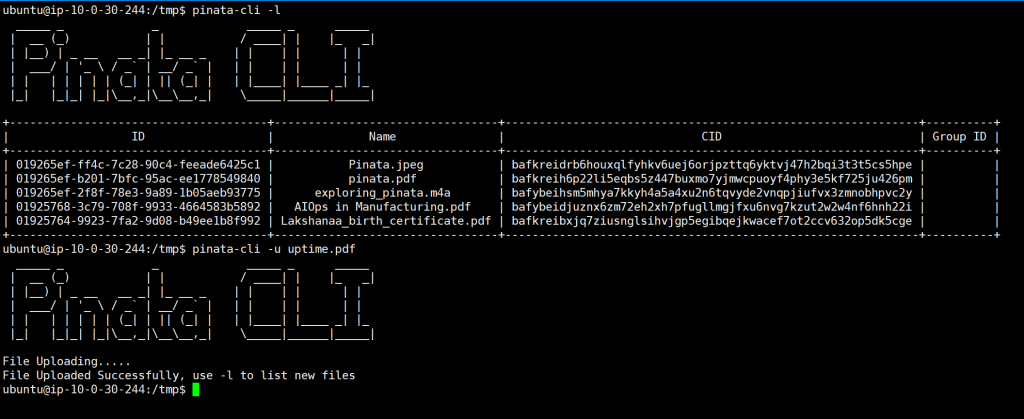
Step 9: Time to Test Pinata CLI
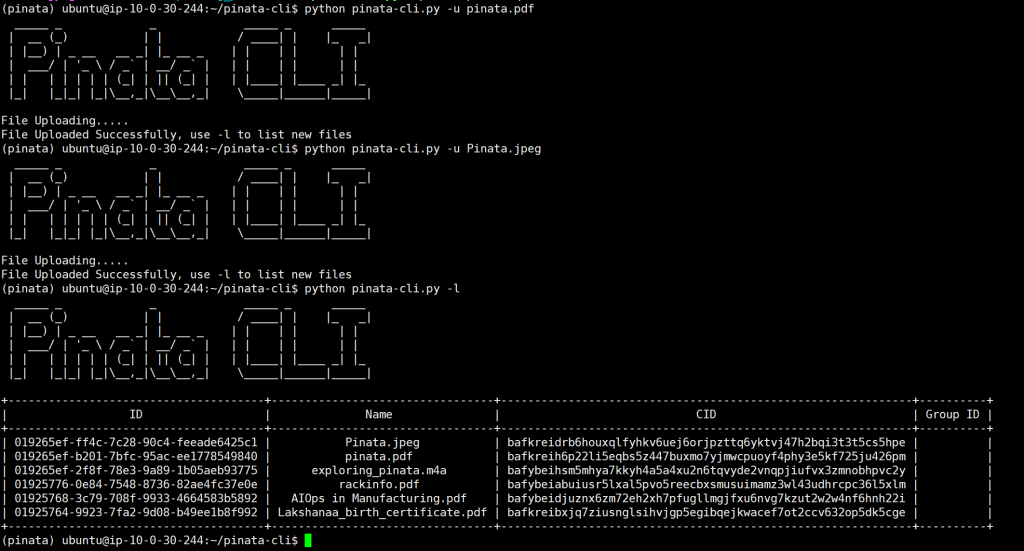
You can test all the Upload, delete, update metadata and check authentication using the cli. use -h for the help message. Here are the screenshots for the same.
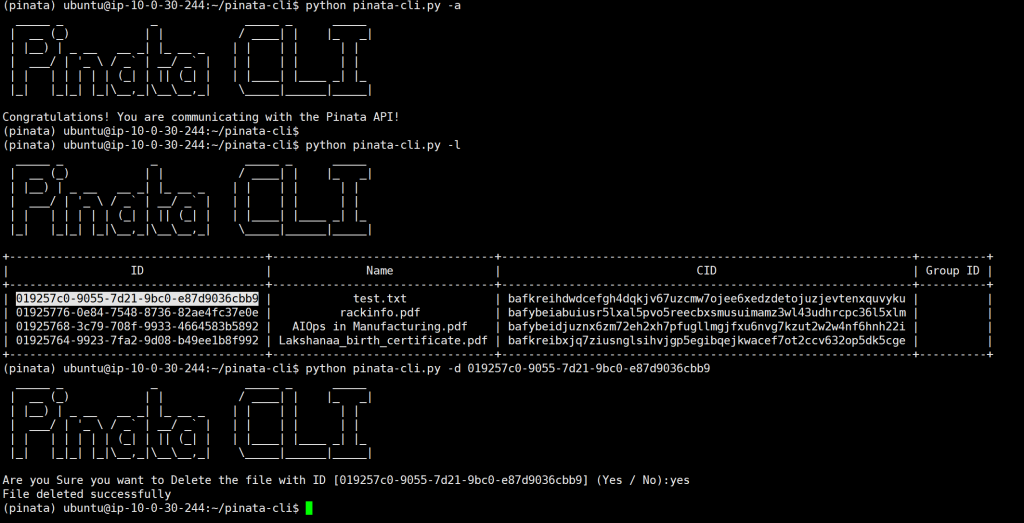
Upload various files to Pinata
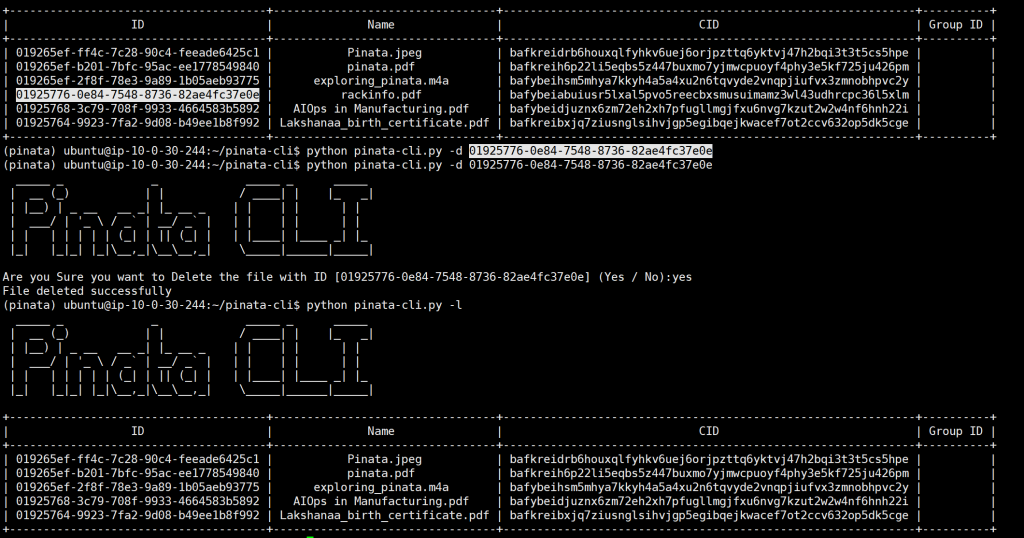
Delete files with ID
You can use python pinata-cli.py -d <ID> to delete the Files from the storage
Step 10: Running Pinata-CLI from pre-compiled releases.
We have also compiled Pinata-CLI for some of the operating system which can be downloaded from the github release from the pinata-cli repository.
All you need to do is to download the release file for the operating system of your choice and untar and just run the pinata-cli using ./pinata-cli. Here is another quick guide for setting up in an Ubuntu operating system.
Step 1: Download the Required Release file from the repo
You can go the this Github release and download the required release file. To download the ubuntu-24 pinata-cli, head back to our terminal and put the below url.
wget https://github.com/oliverbennet/pinata-cli/releases/download/v1.0.0/pinata-cli-ubuntu-24.04.tar.gz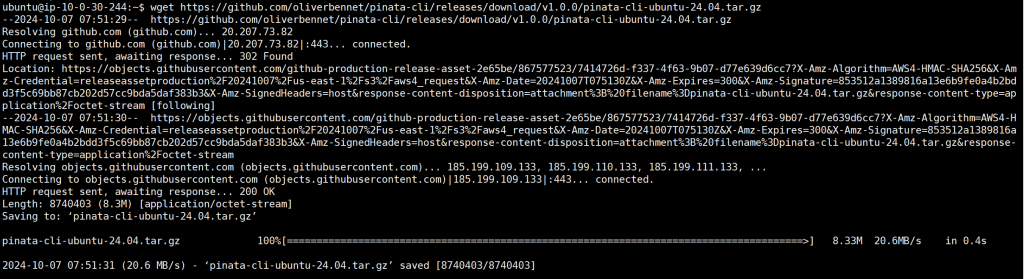
Step 2: untar the package tar.gz file.
tar -zxvf pinata-cli-ubutu-24.04.tar.gz
Step 3: cd to the directory and add pinata-cli to the PATH.
cd pinata-cli-ubuntu-24.04
export PATH=$PATH:$(pwd)
Now, You can run Pinata-CLI from any directory and upload files from any directory.
I hope you enjoyed the tutorial. This way we can setup Pinata-CLI and make use of Pinata’s API Flexibility to any Operating system of your choice.